Sunday, June 26, 2011

In The Small Things Grand Opening!

Yay the day has finally arrived! My shop at Misses BeeHaven is officially open! Come and celebrate with me! I'm having a big sale on my debut products:


The following kits are being released today at 50% off!

Also be sure to sign up for my newsletter! The month of July is going to be super busy, and I'll be hosting speed scraps and a challenge in the forum with fabulous participation prizes! Make sure you sign up for the newsletter so you don't miss specifics on those events (as well as exclusive coupons and freebies!)

Thursday, June 9, 2011

Exciting changes!

For the past several months I've been working towards designing, learning as much as I could about the techniques and process...and I'm excited to announce that I'm opening a store! I will be setting up shop at the wonderful Misses BeeHaven store on June 26th!! In addition, I'm going to be having a big grand opening sale...so be sure to subscribe to my email feed so you don't miss more information on that in the next few days!

Also, to go along with my official debut, I'm having a creative team call!
 Anyone interested, please send me an email with the request details above! :) Below are previews of a couple of the kits that I will be releasing on the 26th :)


And finally, last but not least, I started a facebook page! I plan on using this not only for sale announcements, but also lots of RAKs and freebies...so be sure to click the 'like' button on the right to follow those as well!

Wednesday, May 4, 2011

New Release, New Store, New Name!

Happy Wednesday! Today is a fresh day! Lovely and....snowy. Hah! I woke up to big fat snowflakes falling outside my window. But with a deep breath and forced smile at mother nature, I've made my peace with the fact that it still looks like winter and that I miss the sun.

Anyway, onto more important things! It's Wednesday, which is awesome for a couple of reasons. One of the designers I create for is having the grand opening of her new store at Polka Dot Plum today! To kick off the grad opening, her products are 35% off from now through the end of the week!

With her new store she has also chosen a new name and Pixie Keepsakes is now L'Posh!


And last bu certainly not least, her very first new release as L'Posh! The kit is gorgeous and has a nice combination of summer and sea with a little vintage, a little rustic, and a lot of versatility.

Isn't it fabulous? It makes me want to go on vacation! Here's the layout that I made with it:
Head over to Polka Dot Plum and check out L'Posh!

Friday, April 29, 2011

Awesome New Releases and a Freebie

It's Friday once again--yay! I have a couple of fun, newly released kits to share with you as well as a freebie!

Seal Scraps has partnered with The Scrappy Kat to create the collab kit, Punked (on sale for 40% off this week at Stuff to Scrap).
Here's a layout that I made with the kit:


Also released today is the kit Snookums by Christin's Creations. This adorable baby kit is perfect for baby girls or boys, with pinks, blues, and gender neutral green and yellow. Here's a little preview of the kit:
 And here are a couple of layouts I made with it:

And finally a freebie! Here's a cluster frame I created with Snookums; feel free to snag it then hop over to STS and pick up these wonderful kits ! :)


Download HERE

Monday, April 18, 2011

Hybrid Project: Woven Mini-Basket, Freebie Template

Happy Monday!

In lieu of the fact that Easter is just a hop-skip-and-jump-away, I wanted to post this hybrid project I played with a week or so ago! I was inspired by a project in a kids' magazine that we get, and decided to modify it for hybrid stuff. SO, here's what I came up with. A mini-basket, perfect for Easter or any small gift-giving occasion!

What you'll need:
     - I created a template for this project. Please feel free to download it HERE.
     - Craft glue stick and hot glue gun (hot glue for ribbon and ricrac)
     - Scissors and crafting knife
     - Ink
     - Q-tip (not completely necessary, but makes gluing a ton easier!)
     - ribbon and/or ricrac, string, glitter, buttons (all optional for decorating)

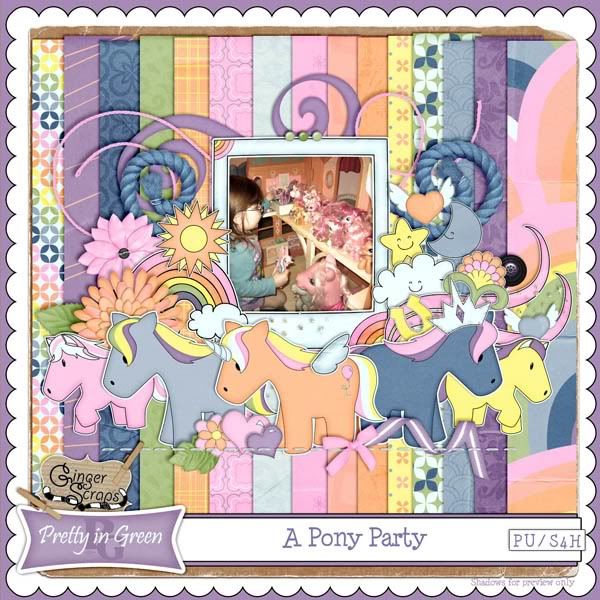
Okay, so after you have the template downloaded and opened up in your editing program of choice, choose a kit you'd like to work with. For this tutorial, I chose 'A Pony Party' by Pretty in Green, because I'm in love with this kit (and so is my daughter). You can snag it HERE at Gingerscraps.

Okay so lets get started!

Sstep 1:

Choose the papers from the kit you'd like to use. Clip them to the basket base in the template as well as the paper strips. There's plenty of room on either of those files to copy additional elements to the 'white' space. You can later cut out these elements by hand and add them to your basket for decoration. After you have everything arranged, flatten your file and print.

Step 2:

Cut out the basket base, strips and elements. The basket base has both solid lines and dotted lines. You'll want to use a cutting tool such as a Xacto knife or something similar to cut the three solid lines in each of the tabs. Score the dotted lines around the center square for easier folding in step 3. If you're an inker, ink all of your edges at this point.
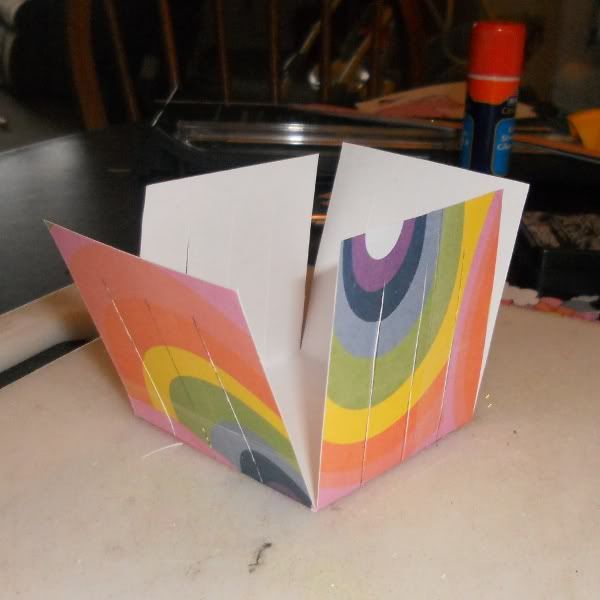
Step 3:

Fold all of your scored lines so that the tabs are sticking up and the printed center is facing down, as shown (excuse my messy workspace...my creativity tends to thrive with a mess on the table, lol):
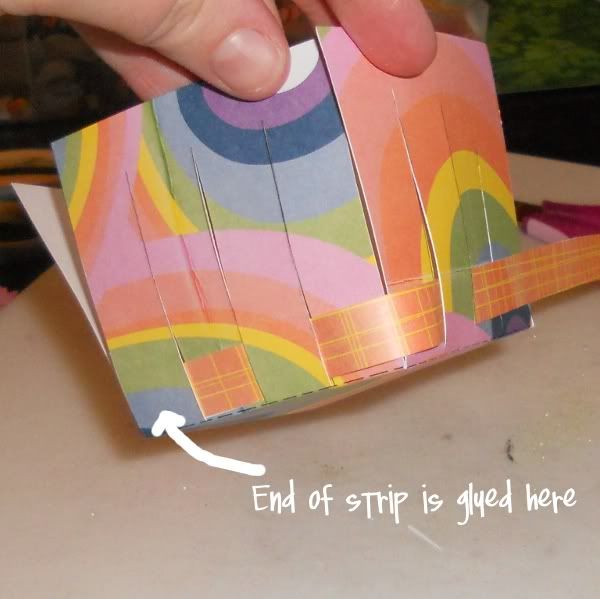
Step 4:

Next choose which strip you'd like to be on the bottom layer of your basket. You'll want to glue about 1/4-1/2" of the end of this strip on the printed side. Tuck the glued end under the first slot on one of the tabs and press together.


Step 5:

Weave the bottom strip in and out of the slots of all four tabs. When you get to the corners, do not tuck both ends in one weave. You'll want one side of the corner above strip and one below. (The above picture is incorrect...I had to go back and change that.) The length of your strip should be just long enough to get you back to the beginning with about 1/4" overlap. Use a Q-tip to glue the end of the strip above the beginning of the same strip. Hold in space for a few seconds until glue dries.
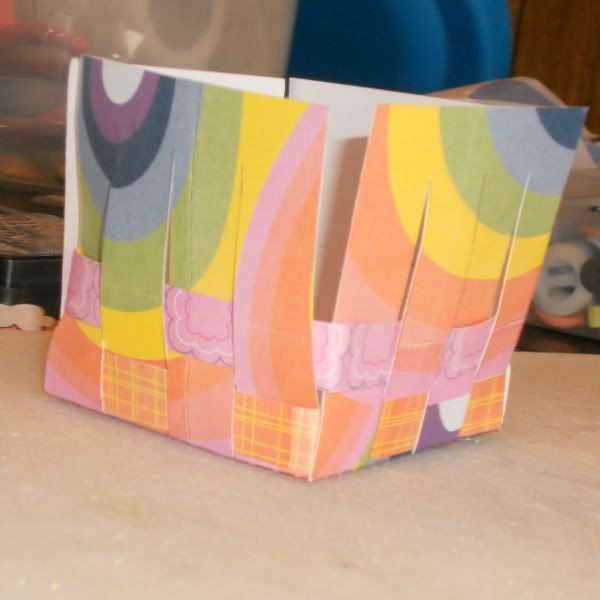
Step 6:

Weave the second strip in the same manner. However, the second strip should be an opposite weave from the first (glue the beginning of your strip to the slot next from the end of the tab). The strip should fit snugly right above the first as shown below:


Step 7:

Repeat this process, continuing to alternate the weave with each level. Four of your five strips should fit snugly in the slots of the tabs.
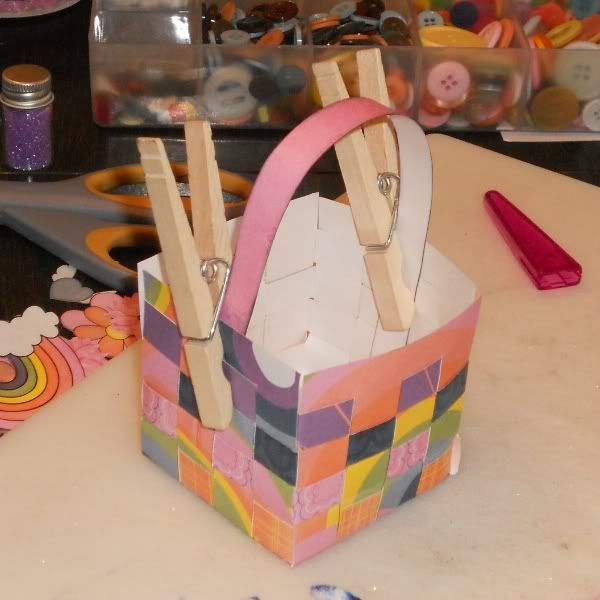
Step 8:

The final strip is the handle of the basket. Glue approximately 2.75" on each end of the printed side of the strip. Place ends on the side of the basket (they should go all the way to the bottom of  the basket and up the side.) Firmly press both sides until glue dries. I used clothespins for extra reinforcement while glue was drying/hardening:

Step 9:

And finally, add your paper cutout embellishments as well as any ribbon, ricrac, glitter and buttons you want to add. To the inside add your gift with tissue paper, or Easter grass with an plastic egg full of goodies, paper flowers, whatever your little heart desires :-)

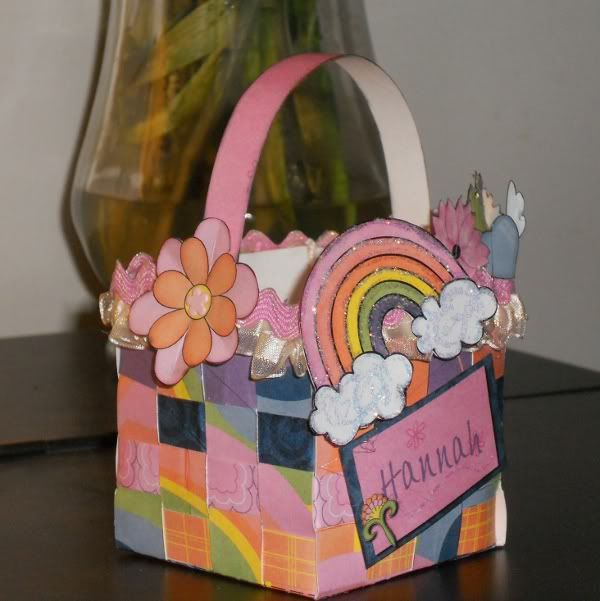
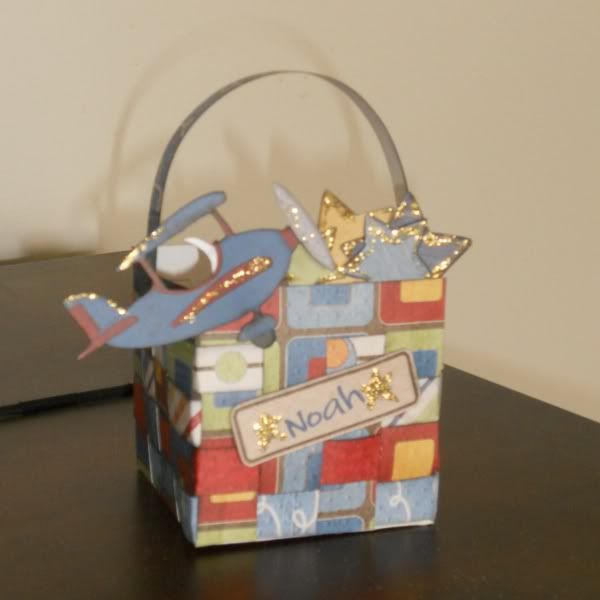
Here's my finished basket, along with the second one I made:
(this second basket was created with the kit 'Frequent Flyer' by Bella Gypsy)

It's that simple! And lots of fun! Thanks for checking out my tutorial. I hope you enjoyed it and have fun trying it out yourself. Happy scrapping! :-)

Friday, April 8, 2011

Ponies!! Newly Released kit from Pretty in Green

I'm SO excited about this kit! It's pretty, it's girly, it's magical, and it's perfect for scrapping photos of my four-year-old daughter and her ponies! It's "A Pony Party" created by the fabulous Pretty in Green. This amazing kit is ON SALE 25% off for this weekend! So head on over to her store HERE and snag it for only $3.75!

This kit is so much fun. I adore it.

And here are a couple of layouts I made with it. :)

Monday, April 4, 2011

Easter Kit Release from Christin's Creations and a Freebie!

Christin's Creations has released a new kit today called Here Comes Peter Cottontail. It is adorable, and great for scrapping girls and boys Easter layouts!
And Christin is hosting and awesome Easter Egg Hunt for this kit! You can collect all of the pieces of this kit by following Christin's Creations blog, Facebook page, etc. Check this out!
 Here are a couple of layouts I made with this kit:
And finally, the freebie I created with the kit for you to download! There are four Easter brag book pages included.
 Click HERE to download the freebie from mediafire.

Be sure to stop by Christin's blog HERE to find more info on the Easter Egg Hunt as well as links to additional brag book pages made with this kit from her other Creative Team members!